tools

April 17, 2025 tools

How to Write Actionable Bug Reports

How to Write Actionable Bug Reports

I often find myself maintaining open source projects. I’ve contributed to many over the years, even hosting multi-person source available” projects on this very website in zip files before there were such things as GitHub or Pull Requests or Open Source Software. No matter what mechanism I’m using to manage the project, if it’s popular, I get issues filed against that project. Those issues break down into two categories:

  1. Feature Requests
  2. Bug Reports

Feature Requests: Include Why

If it’s a feature request, I’ll ask that you include why you’re asking for a feature as well as what you’re asking for. It’s pretty typical for an engineer to have a problem, wish for a particular solution and then ask for it. However, it’s often the case that someone using the project doesn’t quite have the entire architecture in mind when they ask for a solution, which means that the requested solution might not fit in well with the rest of the project.

On the other hand, if you can include why you’re asking for a specific solution, i.e. what problem are you trying to solve, then the maintainer of the project can say no, but…” with an alternative solution that does fit in with the architecture.

A good maintainer will ask why before saying no, but if you provide the why out of the gate, you could save yourself a round trip in the issue’s comments.

Bug Reports: Include a Minimal Repo Project

If the project in question does something that you thought the project should already do but it doesn’t work the way you expect, e.g. sets fire to your garage, then that’s a bug report. For a bug report to be useful, it has to be actionable.

More sophisticated projects will include a template that asks pertinent questions like:

  • What behavior did you see?
  • What behavior did you expect to see?
  • What error message did you get?

However, for me, the biggest thing that makes a bug report actionable is the inclusion of a minimal reproduction project. Each one of the words in that phrase is important and we’ll go through them back to front:

  • Project: I’m looking for the code for an entire project, ideally in a zip file, that I can download, unzip, load up into my IDE, resolve dependencies and run. The project should have everything in there that I need or, if there is something I need to add, like an API key, there should be a clear and prominent comment that makes that clear.

    In a pinch, I’ll take a single source code file where the rest of the project is implied, but it needs to be self-contained and complete.

    The goal is that I can take your code and run it with no muss or fuss. The more popular the project I’m working on is, the more bug reports I’m going to get and the less time I have to spend on each one. Please make it quick and easy for me to run the code that demonstrates your issue, which brings me to…

  • Reproduction: The code you send me should reproduce your issue! And it should put it in my face loud and proud. If it’s an intermittent problem and I can’t get it to happen with a reasonable number of runs, then there’s not a lot I can do to fix it. The goal is to make it clear what the issue is and if it’s not, I’m going to have to drop a comment into the conversation and move on.

  • Minimal: Please please please do not copy and paste your personal or — even worse — your company’s proprietary code into a project issue. I don’t want to see that stuff! And there’s often so so much of it! I want you to spend time removing anything domain-specific and trimming out the code that does not contribute to the problem. I do this for several reasons:

    1. I don’t want your lawyers suing me for someday building something that is similar to something you once posted in a bug on one of my projects.
    2. I want you to have done the legwork to verify that the problem is in my code and not yours. If you trim away the extraneous, then you’ll either figure out that it’s your problem or mine.
    3. If the problem is mine, your minimal repro project is going to make it clear to me that it is my problem, because you’ve cleared away everything that isn’t contributing to the issue. And this helps me to fix it more quickly.

Just One Example

As an example, I saw a bug report recently on the Flutter AI Toolkit, a project I’m working on with the Flutter team. A very nice person posted an issue which seemed like a bug to me, if it’s true, so I wanted to get to work on it right away. However, the bug wasn’t actionable because it didn’t have a minimal repro project, so I posted a comment asking for one.

The person responded quickly with a repro project, but I suspected that it was not minimal because it had domain-specific details in it and there were style settings used. The style settings were a dead giveaway because the issue had nothing to do with look n’ feel. So I asked the person to work on the minimal” part of the minimal reproduction project” and moved on to my next task.

And then they got back to me with a minimal repro project so I could get to work on their issue.

Where Are We?

I am a huge fan of people reporting issues in my projects. Every one of them is an opportunity to make it more useful for a wider set of people, which is why I enjoy working on OSS projects in the first place. If you don’t post issues that are actionable, that’s OK — I’ll ask for the info I need. But if you’d like to move things along a little bit more quickly for yourself, you work put yourself in the maintainer’s shoes and provide the same info you’d need if you were going to fix the issue yourself.

Or, even better, consider a PR. : )

February 29, 2012 tools win8 telerik

What’s New in the Beta Metro/JS Templates for VS11

What’s New in the Beta Metro/JS Templates for VS11

The Consumer Preview of Windows 8 (aka the Win8 beta) is now available for download, along with the matching Visual Studio 11 beta. You can download them both from the Developer Center for Metro style Apps and at least when I did the downloading this morning, it was smooth and worked well. In case you’re interested, I downloaded the ISO, not the setup, and I am currently writing this blog entry in Windows Live Writer running inside a WMWare Workstation 8.0 virtual machine running on the Windows 7 host OS running inside Boot Camp on my MacBook Pro. As someone said to me this morning: That’s a lot of VMs!” Maybe so, but the Win8 and VS11 betas are running surprisingly well inside of my Inception-box.

Metro/JS Templates for VS11 in BUILD

If you played around with the Metro/JS templates in VS11 from the BUILD conference in September, you’ll have noticed that the generated apps were compliant with the Windows 8 UX style guidelines, but that two of the templates — Grip and Split — generated large amounts of code. That’s because these are pretty much the biggest apps that Microsoft has ever shipped as templates. They each have multiples pages and they work hard at being simple but feature complete Metro style apps.

However, as well as the BUILD templates implemented the Win8 UX, their code wasn’t the greatest, for the following reasons:

  • The templates were attempting to codify best practices for a brand-new app model. That’s always going to take time to get right.
  • There was only so much time to get it right before BUILD — it was either have great code or implement a great UX, so the template team chose the latter.
  • The bonehead PM in charge at the time (me) decided it was a better choice to push the data model into each page instead of centralizing it. That was a bad idea.
  • The data model, spread as it was across nearly every JS file in the templates, was assumed to be static. However, the vast majority of apps get their data dynamically from some external source and the template-generated code made that very hard to implement.
  • There were a number of features that the templates needed that didn’t exist directly in the platform, either in WinJS, the IE DOM or in the WinRT libraries, so the templates needed to provide those features.

All of these reasons meant that the functionality of the generate Grid and Split apps made for an instructional start to building your own Metro style apps, assuming you were willing to wade through a great deal of code. The new templates in the Win8 beta solve nearly all of these problems.

Get-VS-11-BetaMetro/JS Templates for VS11 Beta

Out of the box, the Metro/JS templates in the VS11 beta (made available today, Feb 29, 2012), get more betterer as they get more complex.Let’s start simple and work our way up.

image

Blank Application

The Blank Application template is almost the smallest Metro/JS app you can build, except that it includes a reference to the Microsoft Windows Library for JavaScript (aka WinJS):

image

And to be clear, this is a brand new feature. Including WinJS as a reference instead of dropping the code into each project means that MS can shipped a single shared implementation instead of every app in the store duplicating the code. If you want to duplicate the code into your project, you can do so, but you’ll also have to update the URL references to the JS and CSS files from your HTML files, like this snippet from the generated default.html:

default.html
  1. <!– WinJS references –>
  2. <link href=“//Microsoft.WinJS.0.6/css/ui-dark.css” rel=“stylesheet”>
  3. <script src=“//Microsoft.WinJS.0.6/js/base.js”></script>
  4. <script src=“//Microsoft.WinJS.0.6/js/ui.js”></script>

In addition to the new syntax with the leading double-slashes, that the number of WinJS files to include is a far smaller number in the Beta. Now it’s just base.js and ui.js, which makes it easy to decide which one(s) you want and in what order to include them, fixing a common problem in the BUILD bits.

One other thing that’s new in the Blank Application template is that there are stubs for implementing tomb-stoning to easily save and restore your app’s session state in the default.js:

default.js
  1. var app = WinJS.Application;
  2.  
  3. app.onactivated = function (eventObject) {
  4.     if (eventObject.detail.kind === Windows.ApplicationModel.Activation.ActivationKind.launch) {
  5.         if (eventObject.detail.previousExecutionState !== Windows.ApplicationModel.Activation.ApplicationExecutionState.terminated) {
  6.             // TODO: This application has been newly launched. Initialize
  7.             // your application here.
  8.         } else {
  9.             // TODO: This application has been reactivated from suspension.
  10.             // Restore application state here.
  11.         }
  12.         WinJS.UI.processAll();
  13.     }
  14. };
  15.  
  16. app.oncheckpoint = function (eventObject) {
  17.     // TODO: This application is about to be suspended. Save any state
  18.     // that needs to persist across suspensions here. You might use the
  19.     // WinJS.Application.sessionState object, which is automatically
  20.     // saved and restored across suspension. If you need to complete an
  21.     // asynchronous operation before your application is suspended, call
  22.     // eventObject.setPromise().
  23. };

The handling of the terminated state in the onactivated event on line 3 and the checkpoint event handler on like 16 are for reactivating and saving your app state respectively.

And finally, the handy TODO comments are something you’ll find sprinkled throughout the templates based on usability feedback conducted to determine what developers really need help with as they add their own functionality to the app.

Fixed Layout Application

Moving up the complexity scale, the Fixed Layout Application template is meant to do just what it says — provide a jumping off point for apps that are logically fixed layout. The crux of this code is the use of the ViewBox control in the default.html:

default.html
  1. <body>
  2.     <div data-win-control=“WinJS.UI.ViewBox”>
  3.         <div class=“fixedlayout”>
  4.             <p>Content goes here</p>
  5.         </div>
  6.     </div>
  7. </body>

Line 2 wraps the content of the app in a ViewBox control, which will scale everything inside of it to the size of the content, which is defined in the default.css file with the fixedLayout style:

default.css
  1. .fixedlayout {
  2.     -ms-grid-columns: 1fr;
  3.     -ms-grid-rows: 1fr;
  4.     display: -ms-grid;
  5.     height: 768px;
  6.     width: 1024px;
  7. }

You’ll see in lines 5 and 6 that the height and width of the div contained in the ViewBox is 768x1024, which means that the content can be created using absolute positioning and sizing. The job of the ViewBox is as the app is resized, either the computer’s resolution changes or more likely the app is moved between landscape, portrait, split and full sizes, the ViewBox will scale the content to take up as much room as possible, keeping the aspect ratio constant and scaling the content such that the app itself can think of itself as logically 768x1024 (or whatever the top-level div’s size is). This is very handy for building things like casual games where you want scaling, but generally not flowing — you want to control where the Scrabble tiles are or the tic-tac-toe pieces and it’s much easier to do that with a fixed size.

And now that I’ve described it, I’ll tell you that this template is the only one that’s structurally identical between BUILD and Beta. Still, it is useful.

Navigation Application

The next one up the ladder is the Navigation Application template, which is where we get the Back button and the support for moving HTML fragments into and out of the DOM just like the user was logically navigation page-to-page. In the BUILD bits, this navigation functionality was packaged in the default.js file, but in the Beta, default.js is just the same as the simpler templates. Instead, the navigation functionality is packaged into a new file: navigator.js. The reason this file is separate is to make it clear if you’d like to implement a different navigation policy, e.g. MVC, then this is the file to start with. Further, while this functionality would seem a shoe-in to be included in WinJS, it’s not quite baked” enough, which means that MS hasn’t yet decided that this is the way” to do navigation.

Still, it’s a way” to do navigation in a Metro/JS app and a pretty useful one. Essential the way it works is that there is a singleton PageControlNavigator in the default.html file that holds the pages as they’re swapped in. The default.html is also where navigator.js is included:

default.html
  1. <script src=“/js/navigator.js”></script>
  2. <div id=“contenthost” data-win-control=“Application7.PageControlNavigator” data-win-options=“{home: /html/homePage.html’}“></div>

The navigator.js file defines the PageControlNavigator control, which holds the logical pages as the user clicks around in the application. The home parameter is where to start the navigation. Navigation is to a Page, which is really a mapping between an HTML file and a set of events to handle over the lifetime of that Page:

homePage.js
  1. // This function is called whenever a user navigates to this page. It
  2. // populates the page elements with the app’s data.
  3. function ready(element, options) {
  4.     // TODO: Initialize the fragment here.
  5. }
  6.  
  7. WinJS.UI.Pages.define(/html/homePage.html”, {
  8.     ready: ready
  9. });

Of course, navigating to the home page is going to be rare compared to navigating between pages. The easiest way to get a new page to add to your app is to right-click on your project in the Solution Explorer and select Add | New Item:

image

The last item three item templates on the list are for shell contract implementations, which are beyond the scope of this blog post, but the first one is a Page Control, which gives us a triad of HTML, JS and CSS that fits exactly into the navigation model provided by the PageControlNavigator control:

page2.html
  1. <!DOCTYPE html>
  2. <html>
  3. <head>
  4.     <meta charset=“utf-8”>
  5.     <title>page2</title>
  6.  
  7.     <!– WinJS references –>
  8.     <link href=“//Microsoft.WinJS.0.6/css/ui-dark.css” rel=“stylesheet”>
  9.     <script src=“//Microsoft.WinJS.0.6/js/base.js”></script>
  10.     <script src=“//Microsoft.WinJS.0.6/js/ui.js”></script>
  11.    
  12.     <link href=“page2.css” rel=“stylesheet”>
  13.     <script src=“page2.js”></script>
  14. </head>
  15. <body>
  16.     <div class=“page2 fragment”>
  17.         <header aria-label=“Header content” role=“banner”>
  18.             <button class=“win-backbutton” aria-label=“Back” disabled></button>
  19.             <h1 class=“titlearea win-type-ellipsis”>
  20.                 <span class=“pagetitle”>Welcome to page2</span>
  21.             </h1>
  22.         </header>
  23.         <section aria-label=“Main content” role=“main”>
  24.             <p>Content goes here.</p>
  25.         </section>
  26.     </div>
  27. </body>
  28. </html>


page2.cs
  1. .page2 p {
  2.     margin-left: 120px;
  3. }


page2.js
  1. // This function is called whenever a user navigates to this page. It
  2. // populates the page elements with the app’s data.
  3. function ready(element, options) {
  4.     // TODO: Initialize the fragment here.
  5. }
  6.  
  7. function updateLayout(element, viewState) {
  8.     // TODO: Respond to changes in viewState.
  9. }
  10.  
  11. WinJS.UI.Pages.define(/page2.html”, {
  12.     ready: ready,
  13.     updateLayout: updateLayout
  14. });

Navigating to this new control defined by these files is a simple matter of calling the navigate method:

homePage.html
  1. <a onclick=“WinJS.Navigation.navigate(‘/page2.html’)“>Page 2</a>

As far as the user is concerned, the anchor tag shows up as a link like any other:

image

Clicking on Page 2” fires the onclick event, which calls the navigate method, passing in the path to the HTML file and causes the Page control defined in page2.html, page2.js and page2.css to be loaded:

image 

In addition to whatever content on your Page control, notice that the Back button shows up automatically. The Back button manages navigation via clicking, touching and the browser keys; Ctrl+Left Arrow and Ctrl+Right Arrow work as Back and Forward respectively.

Grid and Split Application

At this point, we’ve covered almost all of the core concepts that make up the Grid and Split applications: they bring in WinJS by reference, they use controls and they use navigation via the Page controls. In fact, even though the Grid app has three pages and the Split app has two, they’re really just the navigation template with the pages to implement the Grid and Split app patterns that MS decided were the major app patterns appropriate for Win8. However, the Grid and Split application templates do have two major features that the other templates don’t have: support for multiple view states and a centralized data model.

Multiple view state support means that as the app is moved between portrait, landscape, full and split, the app adjusts itself to look good in all states. The view state management is mostly handled with CSS styles associated with media modes, like in the Split App’s itemsPage.css:

itemsPage.css
  1. @media screen and (-ms-view-state: snapped) {
  2.     .itemspage .itemslist .win-vertical.win-viewport .win-surface {
  3.         margin-bottom: 30px;
  4.     }

In Metro/JS apps, MS has provided a media query predicate called -ms-view-state, which can be one of the four view states and the styles in the media query block will be applied when the app moves to that state. In addition, if you want to handle the view state change in JS, you can do so with updateLayout event in your Page control, like this snippet from itemsPage.js:

itemsPage.js
  1. // This function updates the page layout in response to viewState changes.
  2. updateLayout: function (element, viewState) {
  3.     var listView = element.querySelector(″.itemslist”).winControl;
  4.     if (viewState === Windows.UI.ViewManagement.ApplicationViewState.snapped) {
  5.         listView.layout = new ui.ListLayout();
  6.     } else {
  7.         listView.layout = new ui.GridLayout();
  8.     }
  9. }

In this case, the updateLayout event is called when the control is initially created and as the app moves through the view states so it can change the layout style for the ListView control showing the contents of the page:

imageimage

Landscape vs. Snapped view state layout for the itemsPage ListView control

The other major feature of the Grid and Split app templates — and this feature is new in the Beta bits — is the centralized data model, which is where the data for all pages comes from. This data model is defined in data.js and it contains the static group and item data as you just saw. The core of the data is exposed from data.js like so:

data.js
  1. WinJS.Namespace.define(data”, {
  2.     items: groupedItems,
  3.     groups: groupedItems.groups,
  4.     getItemsFromGroup: getItemsFromGroup
  5. });

These three members of the data object are used throughout the templates, e.g. in the itemsPage.js ready event handler:

itemsPage.js
  1. // This function is called whenever a user navigates to this page. It
  2. // populates the page elements with the app’s data.
  3. ready: function (element, options) {
  4.     var listView = element.querySelector(″.itemslist”).winControl;
  5.     ui.setOptions(listView, {
  6.         itemDataSource: data.groups.dataSource,
  7.         itemTemplate: element.querySelector(″.itemtemplate”),
  8.         oniteminvoked: this.itemInvoked.bind(this),
  9.     });
  10.     this.updateLayout(element, Windows.UI.ViewManagement.ApplicationView.value);
  11. },

Notice that the data.groups property is used on line 6 to perform a data binding operation. That data binding is against the dataSource property of the object returned from data.groups, which itself is created by a method on the WinJS.Binding.List object that holds the grouped item data. It’s this binding list, a new feature in WinJS for the Beta, that makes it easy to move from the static data provided by the templates and dynamic data that your app defines.

The binding list is a binding data source, which means that as you add items to it, it notifies any control that happens to be bound to it. This is especially handy when your app starts up with zero data, but you need to initialize the ListViews such that as the data is available (perhaps from an asynchronous network call), it will be shown.

If you open up the data.js, you’ll see the static sample data:

static sample data
  1. // Each of these sample groups must have a unique key to be displayed
  2. // separately.
  3. var sampleGroups = [
  4.     { key: group1”, title: Group Title: 1”, subtitle: Group Subtitle: 1”, backgroundImage: darkGray, description: groupDescription },
  5.    
  6. ];
  7.  
  8. // Each of these sample items should have a reference to a particular
  9. // group.
  10. var sampleItems = [
  11.     { group: sampleGroups[0], title: Item Title: 1”, subtitle: Item Subtitle: 1”, description: itemDescription, content: itemContent, backgroundImage: lightGray },
  12.    
  13. ];

The group data has a unique key, a title, a subtitle, a background image and a description, which are all fields that the data templates used in the Split and Grid apps depend upon (although you can change them if you like). The item data has a reference to the group to which it belongs, a title, a subtitle, a description, a background image and the content for the item itself.

The code that populates the binding list with the sample data looks like this:

statically bound data
  1. var list = new WinJS.Binding.List();
  2. var groupedItems = list.createGrouped(groupKeySelector, groupDataSelector);
  3.  
  4. // TODO: Replace the data with your real data.
  5. // You can add data from asynchronous sources whenever it becomes available.
  6. sampleItems.forEach(function (item) {
  7.     list.push(item);
  8. });

As the comment makes clear, it’s this code you’re most likely to want to change. Instead of pulling in static data from the sampleItems array, we want to pull the items in asynchronously, perhaps from an RSS feed or two just like my earlier post:

dynamically bound data
  1. var list = new WinJS.Binding.List();
  2. var groupedItems = list.createGrouped(groupKeySelector, groupDataSelector);
  3.  
  4. // RSS feeds
  5. var feeds = [
  6.     { key: feed1”, title: Scott Hanselman”, subtitle: a blog”, backgroundImage: darkGray, description: a blog”, url: http://feeds.feedburner.com/ScottHanselman” },
  7.  
  8.     { key: feed2”, title: Raymond Chen”, subtitle: a blog”, backgroundImage: lightGray, description: a blog”, url: http://blogs.msdn.com/b/oldnewthing/rss.aspx” },
  9.  
  10.     { key: feed3”, title: Chris Sells”, subtitle: a blog”, backgroundImage: mediumGray, description: a blog”, url: http://sellsbrothers.com/posts/?format=rss” },
  11. ];
  12.  
  13. feeds.forEach(function (feed) {
  14.     WinJS.xhr({ url: feed.url }).then(function (request) { processPosts(feed, request); });
  15. });
  16.  
  17. function processPosts(feed, request) {
  18.     // parse the RSS
  19.     var nodes = request.responseXML.selectNodes(//item”);
  20.     for (var i = 0, len = nodes.length; i < len; i++) {
  21.         var node = nodes[i];
  22.         var item = {
  23.             group: feed,
  24.             title: node.selectNodes(title”)[0].text,
  25.             subtitle: node.selectNodes(pubDate”)[0].text,
  26.             description: a post”,
  27.             content: node.selectNodes(description”)[0].text,
  28.             backgroundImage: feed.backgroundImage
  29.         };
  30.         list.push(item);
  31.     }
  32. }

In this case, our group data is a set of RSS feeds, being careful to continue to use the same group field names so I don’t have to update the data templates in the rest of the app. When the app loads, I still create a binding list, but instead of filling it directly, I start an async xhr call (the WinJS XMLHttpRequest wrapper) for each feed, creating an item for each RSS post I find upon a successful completion. Because I’ve left the data model alone and because I’m using the binding list, that’s all I have to change and now the entire app has been updated to support that data:

image

The items page with the set of feeds in the Split app template

image

The split page with the posts from the selected feed

Where Are We?

As you can see, the Metro/JS templates in the VS11 beta start simple and add features with navigation, pages with specific app pattern functionality, multiple view state support and a unified data model. The main difference is the Beta versions of this templates is that code has been simplified, beautified and pushed into WinJS as much as possible to make the inside of your app just as pretty and easy to use as the outside.

Translation

This article has been translated into Serbo-Croatian by Jovana Milutinovich. Enjoy.

December 27, 2011 spout tools

GUI REPL for Roslyn

GUI REPL for Roslyn

If you recall from REPL for the Rosyln CTP 10/2011, I’ve been playing around building a little C# REPL app using Roslyn. That version was built as a Console application, but I’ve refactored and rebuilt it as a WPF application:

image

You can download the source code for both the Console and the WPF versions here:

RoslynRepl Sample Download

The benefit of a real GUI app is that output selection makes a lot more sense and that you could imagine real data visualization into data controls instead of just into strings. However, implementing a REPL shell in a GUI environment requires doing things considerably differently than in a Console app. Besides the stupid things I did, like doing a lot of Console.Write, and things that don’t make sense, like #exit or #prompt, there are a few interesting things that I did with this code, including handling partial submissions, rethinking history and rewiring Console.Write (just cuz it’s stupid when I do it doesn’t mean that it shouldn’t work).

Partial Submissions

In this REPL, I decided that Enter means execute” or newline” depending on whether the submission is complete enough, according to Roslyn, to execute or not. If it is, I execute it, produce the output and move focus to either the next or a new submission TextBox. If the submission isn’t yet complete, e.g. void SayHi() {”, then I just put in a newline. Further, I do some work to work properly with selections, i.e. if you press Enter when there’s a selection, the selection will be replaced with the Enter key.

So far I like this model a lot, since I don’t have to something like separate execute” and newline” into Enter and Alt+Enter or some such.

Rethinking History

In a GUI shell with partial submissions and multi-line editing, the arrows are important editing keys, so can’t be used for access to previous lines in history. Further, a GUI apps makes it very easy to simply scroll to the command that you want via the mouse or Shift+Tab, so there’s not a lot of use for Alt+Arrow keys. Pressing Enter again replaces the old output (or error) with new output (or error):

imageimage

Currently when you re-execute a command from history, the command stays where it is in the history sequence, but it could as easily move to the end. I haven’t yet decided which I like better.

Redirecting Console.Write

Since this is a REPL environment works and acts like a shell, I expect that Console.Write (and it’s cousins like Console.WriteLine) to work. However, to make that work, I need to redirect standard output:

Console.SetOut(new ReplHostTextWriter(host));

The ReplTextWriterClass simply forwards the text onto the host:

class ReplHostTextWriter : TextWriter {
  readonly IReplHost host;

public ReplHostTextWriter(IReplHost host) { this.host = host; } public override void Write(char value) { host.Write(value.ToString()); } public override Encoding Encoding { get { return Encoding.Default; } } }

The hosts implementation of IReplHost.Write simply forwards it onto the currently executing submission (the ReplSubmissionControl represents both a submission’s input and output bundled together). You’ll notice that the TextWriter takes each character one at a time. It would be nice to do some buffering for efficiency, but you’d also like the output to appear as its produced, so I opted out of buffering.

However, one thing I don’t like is the extra newline at the end of most string output. I want the main window to decide how things are output, setting margins and the newline looks like a wacky margin, so the trailing CR/LF had to go. That’s an interesting algorithm to implement, however, since the characters come in one at a time and not line-by-line. I want separating newlines to appear, just not trailing newlines. I implement this policy with the TrimmedStringBuilder class:

// Output a stream of strings with \r\n pairs potentially spread across strings,
// trimming the trailing \r and \r\n to avoid the output containing the extra spacing.
class TrimmedStringBuilder {
  readonly StringBuilder sb;

  public TrimmedStringBuilder(string s = "") {
    sb = new StringBuilder(s);
  }

  public void Clear() {
    sb.Clear();
  }

  public void Append(string s) {
    sb.Append(s);
  }

  public override string ToString() {
    int len = sb.Length;

    if (len >= 1 && sb[len - 1] == '\r') {
      len -= 1;
    }
    else if (len >= 2 && sb[len - 2] == '\r' && sb[len - 1] == '\n') {
      len -= 2;
    }

    return sb.ToString(0, len);
  }
}

Usage inside the ReplSubmissionControl.Write method is like so:

public partial class ReplSubmissionControl : UserControl {
...
  TrimmedStringBuilder trimmedOutput = new TrimmedStringBuilder();

  public void Write(string s) {
    if (s == null) { trimmedOutput.Clear(); }
    else { trimmedOutput.Append(s); }

    consoleContainer.Content = GetTextControl(trimmedOutput.ToString());
  }
}

Now, as the input comes in one character at a time, the trailing newlines are removed but separating newlines are kept. Also, you may be interested to know that the GetTextControl function builds a new read-only TextBox control on the fly to host the string content. This is so that the text can be selected, which isn’t possible when you set the content directly.

Right now, there’s no support for Console.Read, since I don’t really know how I want that to happen yet. Pop-up a dialog box? Something else?

Completions, Syntax Highlighting and Auto-indent

I was a few hundred lines into implementing completions using Roslyn with the help of the Roslyn team when I realized two things:

  1. Implementing completions to mimic the VS editor is hard.
  2. Completions aren’t enough — I really want an entire C# editor with completions, syntax highlighting and auto-indentation.

Maybe a future release of Roslyn will fix one or both of these issues, but for now, both are out of scope for my little REPL project.

December 14, 2011 spout tools data

Moving My Data To The Cloud: Stormy Weather

Moving My Data To The Cloud: Stormy Weather

For years, I’ve maintained a single main” computer. It was the computer that was the central authority of all of the personal data I’d accumulated over the years and from which it made me uncomfortable to be separated. Because I needed a single computer for everything, it had to work on my couch, on a plane, on a desk and everywhere else I ever needed to go. Also, it couldn’t have a giant monitor or multiple monitors, because it had to go everywhere. All of this was because I needed all of my data with me all of the time.

My process for moving to a new computer used to include a lot of manual copying of files from the old D hard drive (D is for Data) to my new hard drive, which was also carefully partitioned into C for Windows, Office, Visual Studio, etc. and D for a lifetime of books and articles, coding projects and utilities I’ve collected over the years, e.g. LinqPad, Reflector, WinMerge, etc. This is 30GB of stuff I wanted access to at all times. I was also backing up via Windows Home Server, keeping photos and music on the WHS box (another 30GB), then backing that up to the cloud via KeepVault. And finally, as I upgraded HDs to go bigger or go to solid state, I kept each old HD around as another redundant backup.

All of that gave me some confidence that I was actually keeping my data safe right up until my Windows Home Server crashed the system HD and I found out that the redundancy of WHS doesn’t quite work the way you’d like (this was before I installed KeepVault). This was a first generation HP Home Server box and when it went down, I took it apart so I could attach a monitor, keyboard and mouse to diagnose it, pulled the HDs out so I could read what files I could and ultimately had to drop it off in Redmond with the WHS team so I could get it up and running again.

There are some files I never got back.

KeepVault gave me back some of the confidence I’d had before WHS crashed, but they didn’t provide me a way to see what files they were backing up, so I didn’t have the transparency I wanted to be confident. Further, they don’t have clients on every kind of platform like Dropbox does.

Of course, simply sync’ing files isn’t enough — sync’ing my 10GB Outlook PST file every time I got a new email was not a good way to share 20 years of contacts, email and calendar items.

The trick is to sync each kind of data in the right way, be confident that it’s safe and have access to it across the various platforms I use: Windows, Windows Phone 7, iOS and possibly Android (you know, if I feel like walking on the wild side!). And since I’m currently under employed (my new gig doesn’t start till the new year), I figured I’d do it once and do it right. I almost got there.

Files

Let’s start easy: files. Dropbox has made this a no-brainer. You install the software on any platform you care to use, drop everything you want into the folder and it just works, keeping files in sync on the cloud and across platforms, giving you adequate (although not great) status as it does so. Most platforms are supported natively, but even on platforms that aren’t, there are often alternative clients, e.g. I’m using Boxfiles for Windows Phone 7. When I gave up my Microsoft laptop, instead of doing the dance of the copy fairy to my new Mac Book Air, I installed Dropbox on both computers, dropped everything I want backed up and sync’d between computers into the Dropbox folder. 36 hours and 30GB later, all of it was copied into the cloud and onto my new laptop, at which point I reformatted my Microsoft laptop and handed it into my boss.

Further, as a replacement for WHS and KeepVault, I now keep all of the files that I was keeping just on my WHS server — photos and music primarily — into Dropbox.

image

This keeps me the confidence I need to know that my files are safe and backed up to the cloud, while making it very easy to keep it backed up locally by simply running Dropbox on more than one computer at my house. If at any time, I don’t want those files on any one computer, I tell Dropbox to stop sync’ing those folders, delete the local cache and I’m all done.

There are two tricks that I used to really make Dropbox sing for me. The first is to change my life: I no longer partition my HDs into C and D. The reason I’d always done that was so that I could repave my C with a fresh Windows, Office and VS install every six months w/o having to recopy all my data. Windows 7 makes this largely unnecessary anyway (bit rot is way down on Win7), but now it doesn’t matter — I can blow any computer away at will now, knowing that Dropbox has my back. In fact, Dropbox is my new D drive, but it’s better than that because it’s dynamic. The C drive is my one pool of space instead of having to guess ahead of time how to split the space between C and D.

The other thing I did was embrace my previous life: I wanted to keep D:\ at my fingertips as my logical Data” drive. Luckily, Windows provides the subst” command to do just that. Further, ntwind software provides the fabulous VSubst utility to do the mapping and keep it between reboots:

image

Now, I’ve got all the convenience of a dedicated data” drive backed up to the cloud and sync’d between computers. Because I needed 60GB to start, I’m paying $200/year to Dropbox for their 100GB plan. This is more expensive than I’d like, but worth it to me for the data I’m storing.

There is a hitch in this story, however. Right now on Dropbox, data and metadata is available to Dropbox employees and therefore to anyone that hacks Dropbox (like the government). I don’t like that and for my very most sensitive data, I keep it off of Dropbox. When Dropbox employees themselves aren’t able to read Dropbox data or metadata, then I’ll move the sensitive data there, too.

Music

I’m not actually very happy with how I’m storing music. I can play all my music on any PC, but I can only play it one song at a time on my WP7 because there’s no Dropbox music client. I could use the Amazon cloud drive that provides unlimited music storage for $20/year, but there’s no WP7 client for that, either. Or I could spend $100/year on Amazon and get my 100GB of storage, but their client isn’t as widely available as Dropbox. Ironically, Dropbox is using Amazon as their backend, so hopefully increased pressure in this space will drop Dropbox’s prices over time.

Photos

I’m not using Facebook or Flicr for my photos simply because I’m lazy. It’s very easy to copy a bunch of files into Dropbox and have the sync’ing just happen. I don’t want to futz with the Facebook and Flickr web interfaces for 15GB worth of photos. Right now, this is the digital equivalent of a shoebox full of 8x10s, but at least I’ve got it all if the house burns down.

imageNotes and Tasklist

For general, freeform notes, I moved away from Evernote when they took the search hotkey away on the Windows client (no Ctrl+F? really?) and went to OneNote. The web client sucks, but it’s better than nothing and the Windows and WP7 clients rock. I have a few notes pinned to my WP7 home screen that I use for groceries, tasks, etc., and I have all of my favorite recipes in there, too, along with my relatives’ wi-fi passwords that they don’t remember themselves, a recording of my son snoring, etc. It’s a fabulous way to keep track of random data across platforms.

On the task list side, I only sorta use OneNote for that. I also send myself emails and write little TODO.txt files every time I get a little bee in my bonnet. I’ve never found that the Exchange tasks sync well enough between platforms to invest in them. Maybe someday.

imageMail, Contacts and Calendar

And speaking of Exchange, that’s a piece of software that Microsoft spoiled me on thoroughly. This is sync that works very well for contacts, emails and calendar items. IMAP does email folders, but server implementations are spotty. For years, I used Exchange for my personal contacts and calendar, only keeping my personal email separate in a giant PST file, pulling it down via POP3. This can sorta be made to work, but what I really wanted was hosted Exchange.

However, what I found cost between $5 and $11 a month per user. I’d probably have gone with Office 365 for sellsbrothers.com mail, even at $5/month except for two reasons. The first is that Microsoft requires you to move your entire DNS record to them, not just the MX record, which means there is all kinds of hassle getting sellsbrothers.com working again. They do this so that they can get all of the DNS records working easily for Lync, Sharepoint, etc., but I don’t want those things, so it’s just a PITA for me. If they change this, I’d probably move except for the other problem: I’m not the only user on sellsbrothers.com.

For years to be the big shot at family gatherings, I’ve been offering up permanent, free email addresses on my domain. That’s all well and good, but now to maintain my geek cred, I need to keep my mom, my step-mom, my brother, my sons, etc., in an email server that works and one that they don’t have to pay for. So, while I was willing to pay $5/month for hosted exchange for me, I wasn’t willing to pay it for my relatives, too!

One option I tried was asking securewebs.com (my rocking ISP!) to upgrade to SmarterMail 8.x, but that didn’t work. I even footed the one-time fee of $200 for the ActiveSync support for SmarterMail, but I couldn’t make that sync from Outlook on the desktop or the phone either.

Eventually I made an imperfect solution work: Hotmail. The nice thing about Hotmail is that it’s free for 25GB (yay webmail storage wars!) and it syncs contacts, mail and calendar items just like I want. Further, with some effort (vague error messages are not useful!), I was able to get Hotmail to pull in my personal email. And, after installing the Outlook Hotmail Connector (explicitly necessary because my Windows Live ID is not a @live.com or an @hotmail.com email address), I was able to sync almost everything, including the folders I copied from my giant PST file, via hotmail to both my desktop and phone Outlook. However, there are a few downsides:

  • There is an intrinsic delay between when someone sends me an email and when it syncs to any device because Hotmail is polling via POP3. This polling is annoying and sometimes sends me directly to the web mail frontend where I can interact with my personal email directly.
  • The Outlook Hotmail Connector sync’ing progress indication is terrible in that it seems to stack every time I press F9 (a bad habit from years of POP3 usage) and I can’t tell what it’s working or or when it will finish. Because of this, I’ve trimmed the set of email folders I sync to the ones I really use, using the PST file as an archive for days gone by.
  • Hotmail does the right thing with the Reply To”, but sometimes weird @hotmail addresses with random characters shows up in email threads, which breaks the fourth wall. That’s annoying.
  • My RSS Folders don’t sync to my phone, which is a shame because I really loved having my Hacker News folder pinned to my WP7 home page letting me know where there were new items. None of the RSS readers on WP7 seem to work as well as a simple pinned email folder.

The good news is that this all works for free and my relatives continue to have working email. The bad news is that it doesn’t work nearly as well as the Exchange server I’m used to. Hopefully I will be able to revisit this in the future and get it working correctly.

imagePC Games

I purchase all of my games via Steam now and install them as the mood strikes me. I love being able to reinstall Half-Life 2 or Portal on demand, then blow it away again when I need the hard drive space. Steam is the only viable app store for Windows right now, although I am looking forward to have the Microsoft app store in Windows 8.

imageBackups

I no longer maintain backups” in the sense that I can slap in a new HD, boot from a USB stick and have my computer restored in 30 minutes or less (that never worked between WHS and Dell laptops anyway). I’ve had HD problems, of course, but they’re so rare that I no longer care about that scenario. Instead, what I do is keep all of the software that I normally install on a file server (the new job of my WHS box). If the file server goes down, then most of the software I install, i.e. Windows 7, Office and Visual Studio, is available for download via an MSDN Subscription. The rest is easily available from the internet (including Telerik tools and controls!) and I just install it as I need it.

Where Are We?

In order to free myself from any specific PC, I needed to pick a new centralized authority for my data: the cloud. The experience I was after for my PCs was the same one I already have on my phone — if I lose it, I can easily buy a new one, install the apps on demand and connect to the data I already had in Exchange, Hotmail, Skydrive, etc. Now that I’ve moved the rest of my world to Dropbox, I can treat my PCs and tablets like phones, i.e. easily replaceable. It’s not a perfect experience yet, but it’s leaps and bounds ahead of where it was even a few years ago.

Hardware and software comes and goes; data is forever.

November 26, 2011 tools .net

REPL for the Rosyln CTP 10/2011

REPL for the Rosyln CTP 10/2011

I don’t know what it is, but I’ve long been fascinated with using the C# syntax as a command line execution environment. It could be that PowerShell doesn’t do it for me (I’ve seriously tried half a dozen times or more). It could be that while LINQPad comes really close, I still don’t have enough control over the parsing to really make it work for my day-to-day command line activities. Or it may be that my friend Tim Ewald has always challenged csells to sell C shells by the sea shore.

Roslyn REPL

Whatever it is, I decided to spend my holiday time futzing with the Roslyn 2011 CTP, which is a set of technologies from Microsoft that gives you an API over your C# and VB.NET code.

Why do I care? Well, there are all kinds of cool code analysis and refactoring tools I could build with it and I know some folks are doing just that. In fact, at the BUILD conference, Anders showed off a Paste as VB command built with Roslyn that would translate C# to VB slick as you please.

For me, however, the first thing I wanted was a C# REPL environment (Read-Evaluate-Print-Loop). Of course, Roslyn ships out of the box with a REPL tool that you can get to with the View | Other Windows | C# Interactive Window inside Visual Studio 2010. In that code, you can evaluate code like the following:

> 1+1 2
> void SayHi() { Console.WriteLine("hi"); }
> SayHi();
hi

Just like modern dynamic languages, as you type your C# and press Enter, it’s executed immediately, even allowing you to drop things like semi-colons or even calls to WriteLine to get output (notice the first 1+1” expression). This is a wonderful environment in which to experiment with C# interactively, but just like LINQPad, it was a closed environment; the source was not provided!

The Roslyn team does provide a great number of wonderful samples (check the Microsoft Codename Roslyn CTP - October 2011” folder in your Documents folder after installation). One in particular, called BadPainting, provides a text box for inputting C# that’s executed to add elements to a painting.

But that wasn’t enough for me; I wanted at least a Console-based command line REPL like the cool Python, JavaScript and Ruby kids have. And so, with the help of the Roslyn team (it pays to have friends in low places), I built one:

RoslynRepl Sample Download

Building it (after installing Visual Studio 2010, Visual Studio 2010 SP1, the Visual Studio 2010 SDK and the Roslyn CTP) and running it lets you do the same things that the VS REPL gives you:

RoslynRepl

In implementing my little RoslynRepl tool, I tried to stay as faithful to the VS REPL as possible, including the help implementation:

replhelp

If you’re familiar with the VS REPL commands, you’ll notice that I’ve trimmed the Console version a little as appropriate, most notably the #prompt command, which only has inline” mode (there is no margin” in a Console window). Other than that, I’ve built the Console version of REPL for Roslyn such that it works just exactly like the one documented in the Roslyn Walkthrough: Executing Code in the Interactive Window.

Building a REPL for any language is, at you might imagine, a 4-step process:

  1. Read input from the user
  2. Evaluate the input
  3. Print the results
  4. Loop around to do it again until told otherwise

Read

Step 1 is a simple Console.ReadLine. Further, the wonder and beauty of a Windows Console application is that you get complete Up/Down Arrow history, line editing and even obscure commands like F7, which brings up a list of commands in the history:

replbeauty

The reading part of our REPL is easy and has nothing to do with Roslyn. It’s evaluation where things get interesting.

Eval

Before we can start evaluating commands, we have to initialize the scripting engine and set up a session so that as we build up context over time, e.g. defining variables and functions, that context is available to future lines of script:

using Roslyn.Compilers;
using Roslyn.Compilers.CSharp;
using Roslyn.Compilers.Common;
using Roslyn.Scripting;
using Roslyn.Scripting.CSharp;
...
// Initialize the engine
string[] defaultReferences = new string[] { "System", ... }; string[] defaultNamespaces = new string[] { "System", ... }; CommonScriptEngine engine = new ScriptEngine(defaultReferences, defaultNamespaces);
// HACK: work around a known issue where namespaces aren't visible inside functions
foreach (string nm in defaultNamespaces) {
  engine.Execute("using " + nm + ";", session);
}

Session session = Session.Create();

Here we’re creating a ScriptEngine object from the Roslyn.Scripting.CSharp namespace, although I’m assigning it to the base CommonScriptEngine class which can hold a script engine of any language. As part of construction, I pass in the same set of assembly references and namespaces that a default Console application has out of the box and that the VS REPL uses as well. There’s also a small hack to fix a known issue where namespaces aren’t visible during function definitions, but I expect that will be unnecessary in future drops of Roslyn.

Once I’ve got the engine to do the parsing and executing, I creating a Session object to keep context. Now we’re all set to read a line of input and evaluate it:

ParseOptions interactiveOptions =
new ParseOptions(kind: SourceCodeKind.Interactive,
languageVersion: LanguageVersion.CSharp6);
... while (true) { Console.Write("> "); var input = new StringBuilder(); while (true) { string line = Console.ReadLine(); if (string.IsNullOrWhiteSpace(line)) { continue; } // Handle #commands ... // Handle C# (include #define and other directives) input.AppendLine(line); // Check for complete submission if (Syntax.IsCompleteSubmission(
SyntaxTree.ParseCompilationUnit(
input.ToString(), options: interactiveOptions))) {
break;
}
Console.Write(". "); } Execute(input.ToString()); }

The only thing we’re doing that’s at all fancy here is collecting input over multiple lines. This allows you to enter commands over multiple lines:

replmultiline

The IsCompleteSubmission function is the thing that checks whether the script engine will have enough to figure out what the user meant or whether you need to collect more. We do this with a ParseOptions object optimized for interactive” mode, as opposed to script” mode (reading scripts from files) or regular” mode (reading fully formed source code from files). The interactive” mode lets us do things like 1+1” or x” where x” is some known identifier without requiring a call to Console.WriteLine or even a trailing semi-colon, which seems like the right thing to do in a REPL program.

Once we have a complete command, single or multi-line, we can execute it:

public void Execute(string s) {
  try {
    Submission<object> submission = engine.CompileSubmission<object>(s, session);
    object result = submission.Execute();
    bool hasValue;
    ITypeSymbol resultType = submission.Compilation.GetSubmissionResultType(out hasValue);

    // Print the results
    ...
  }
  catch (CompilationErrorException e) {
    Error(e.Diagnostics.Select(d => d.ToString()).ToArray());
  }
  catch (Exception e) {
    Error(e.ToString());
  }
}

Execution is a matter of creating a submission,” which is a unit of work done by the engine against the session. There are helper methods that make this easier, but we care about the output details so that we can implement our REPL session.

Print

Printing the output depends on the type of a result we get back:

ObjectFormatter formatter =
new ObjectFormatter(maxLineLength: Console.BufferWidth, memberIndentation: " ");
...
Submission
<object> submission = engine.CompileSubmission<object>(s, session); object result = submission.Execute(); bool hasValue; ITypeSymbol resultType =
submission.Compilation.GetSubmissionResultType(out hasValue); // Print the results if (hasValue) { if (resultType != null && resultType.SpecialType == SpecialType.System_Void) { Console.WriteLine(formatter.VoidDisplayString); } else { Console.WriteLine(formatter.FormatObject(result)); } }

As part of the result output, we’re leaning on an instance of an object formatter” which can trim things for us to the appropriate length and, if necessary, indent multi-line object output.

In the case that there’s an error, we grab the exception information and turn it red:

void Error(params string[] errors) {
  var oldColor = Console.ForegroundColor;
  Console.ForegroundColor = ConsoleColor.Red;
  WriteLine(errors);
  Console.ForegroundColor = oldColor;
}
public void Write(params object[] objects) {
  foreach (var o in objects) { Console.Write(o.ToString()); }
}

void WriteLine(params object[] objects) {
  Write(objects);
  Write("\r\n");
}

replerror

Loop

And then we do it all over again until the program is stopped with the #exit command (Ctrl+Z, Enter works, too).

Where Are We?

Executing lines of C# code, the hardest part of building a C# REPL, has become incredibly easy with Roslyn. The engine does the parsing, the session keeps the context and the submission gives you extra information about the results. To learn more about scripting in Roslyn, I recommend the following resources:

Now I’m off to add Intellisense support. Wish me luck!

December 11, 2010 tools

Using LINQPad to Run My Life: Budgeting

Using LINQPad to Run My Life: Budgeting

I use LINQPad all the time for a bunch of stuff, but most recently and most relevant, I’ve been using it for a personal chore that isn’t developer-related: I’ve been using it to do budgeting.

What is LINQPad?

LINQPad is an interactive execution environment for LINQ queries, statements or programs. The typical usage model is that you point LINQPad at a SQL database or an OData endpoint via a dialog box and then start writing queries against the tables/collections exposed by that connection, e.g.

clip_image002

Here, you can see that I’ve added a connection on the left to the Northwind database, typed a query into the text box (I paid the $25 for the auto-completion module), executed the query and got the table of results below. If I want to operator over multiple results, including dumping them for inspection, I can do so by switch from C# Expression to C# Statements:

clip_image004

Notice the use of Dump” to see results along the way. If I want to, I can switch to C# Program, which gives me a main and allows me to create my own types and methods, all of which can be executed dynamically.

To save queries, notice the My Queries” tab in the lower left. I use this for things I run periodically, like the ads on my web site that are going to expire, some data cleanup I want to get back to and, the subject of today: budgeting.

Budgeting with Mint.com and LINQPad

For the uninitiated, mint.com is a free online personal financial management site. At its core, it uses financial account, loan and asset information that lets it log into various financial sites and grab my data for me, e.g. 1sttech.com, usbank.com, wcb.com, etc. It uses this to let me categorize transactions so that it can do budgeting for me. However, it doesn’t give me the control I want, so I write programs against this unified transaction information. Essentially, I re-categorize each transaction to my own set using a map I maintain in an Excel file, then compare the amount I spend each month against what my budget amount is, maintained in another sheet in that same Excel file. Because mint.com doesn’t provide a programmatic API (OData would be a godsend!), I pull down my transaction history as a CSV file that the web site provides for me, which I then translate to an Excel file.

Once I have these three Excel sheets, the translation history, the category map and the category budget amounts, I bring these pieces of data into my LINQPad script:

void Main() {
    var mintExcel = ExcelProvider.Create(@"D:\data\finances\2010-08-25 mint transactions.xlsx");
    var minDate = new DateTime(2010, 8, 1);
    var txs = mintExcel.GetSheet<Tx>().Where(t=>t.Date>=minDate);
    var debits = txs.Where(tx => tx.Type == "debit");

    var classExcel = ExcelProvider.Create(@"d:\data\finances\2010-08-03 mint category map.xlsx");
    var map = classExcel.GetSheet<CategoryClass>().ToList();
    var classBudget = classExcel.GetSheet<ClassBudget>().ToList();
    var unclassified = new ClassBudget() { Class = "UNCLASSIFIED" };
    classBudget.Add(unclassified);
    var classifiedDebits = debits.
      Select(d => new { d.Date, d.Description, Amount = d.Amount, d.Category, Class = GetClass(map, d) }).
      Where(d => d.Class != null);
    
    // TODO: break this down by month
    // TODO: sum this by ytd
    var classifiedTotals =
        from d in classifiedDebits
        group d by d.Class into g
        let b = classBudget.FirstOrDefault(b=>b.Class == g.Key) ?? unclassified
        let total = g.Sum(d=>d.Amount)
        select new {
            Class = b.Class,
            BudgetAmount = b.Amount,
            ActualAmount = total,
            AmountLeft = b.Amount - total,
            TxCount = g.Count(),
            Transactions = from tx in g.OrderBy(tx=>tx.Date)
                select new { Date = tx.Date.ToString("M/d/yy"), tx.Description, tx.Category, tx.Amount }
        };
    classifiedTotals.OrderBy(d=>d.Class).Dump(2);
    //classifiedTotals.OrderBy(d=>d.Class).Dump();
}

static string GetClass(List<CategoryClass> map, Tx tx) {
  CategoryClass cc = map.FirstOrDefault(m => m.Category == tx.Category);
  if( cc != null ) { return cc.Class; }
  tx.Category.Dump("UNCLASSIFIED MINT CATEGORY");
  return null;
}

[ExcelSheet(Name = "transactions(1)")]
public class Tx {
    [ExcelColumn()] public DateTime Date { get; set; }
    [ExcelColumn()] public string Description { get; set; }
    [ExcelColumn()] public decimal Amount { get; set; }
    [ExcelColumn(Name = "Transaction Type")] public string Type { get; set; }
    [ExcelColumn()] public string Category { get; set; }
    [ExcelColumn(Name = "Account Name")] public string AccountName { get; set; }
}

[ExcelSheet(Name = "Sheet1")]
public class CategoryClass {
    [ExcelColumn()] public string Category { get; set; }
    [ExcelColumn(Name="Classification")] public string Class { get; set; }
}

[ExcelSheet(Name = "Sheet2")]
public class ClassBudget {
    [ExcelColumn(Name="Classification")] public string Class { get; set; }
    [ExcelColumn()] public decimal Amount { get; set; }
    public int Transactions { get; set; }
}

There are some interesting things to notice about this script:

  • I needed to make it a full-fledged program so that I could define the shape of my data in Excel. LINQPad has no native support for Excel data, so I had modify an Excel LINQ provider I found on the interwebtubes. The types are needed to map the Excel columns to C# types so that I can query against them.
  • This script isn’t pretty; it’s been built up over time and it works. I’ve been using it for a month and this month my task is to split it work across multiple months.
  • I’ve built up error output over time to make sure I’m not dropping data in my queries. I spent an hour a coupla weeks ago tracking down 3 transactions.
  • I’m doing slow look-ups cuz at the time I wrote this script, I wasn’t sure how to write joins in LINQ. It’s more than fast enough for my needs, so I’ve only dug into LINQ for accuracy, not efficiency.

LINQPad Output

By default, the output from my budgeting program looks like this (w/ my personal financial details blacked out):

clip_image006

Some things to notice:

  • The output is spit into a table w/o me having to do anything except dump the data.
  • The number columns have an automatic bar graph glyph on them that shows proportions when clicked.
  • The number columns are automatically totally.
  • The Transactions column is turned off because I said Dump(2)”, which only dumps to the 2nd level. By default it would drill down further, e.g.

clip_image008

Bringing in Excel

To bring my Excel data into LINQPad, which supports LINQ to SQL, EF and OData natively but not Excel, I have to right-click on the design surface, choose query properties and tell it about where the source code and namespace is that defines the Excel LINQ Query Provider:

image

image

Impressions

The thing that makes this app really work for me is the REPL nature. It’s very immediate and I can see where my money is going with very little ceremony. It’s really the intelligence of the Dump command that keeps me from moving this app to WPF. Dump gives me the view I need to understand where my money goes and it gives me the programming surface to slice/dice the data the way I want to. I have no control out of the box in WPF that’s even close to as useful.

However, Even though I could extend LINQPad myself, there is no integrated support for Excel or CSV files. Further, for some stupid reason, I have to load the files into a running instance of Excel for them to load in LINQPad, which pisses me off because the error messages are ridiculous. Also, there is no intrinsic support for multiple data sources; instead I need to build that myself.

Further, I had one case where I couldn’t figure out an error (it was that I forgot to load the data into Excel) and had to have a real debugger, which LINQPad didn’t have. The good news was that I was able to copy/paste my code into a console application and debug it, but the bad news was that I really missed the Dump command when I was running inside Visual Studio.

Where Are We?

I really love LINQPad. In fact, I find myself wanting the same functionality for other uses, e.g. SQL (real SQL), JavaScript and as a shell. It’s the interactive data access that makes it for me — munge some data, look at it, repeat. It doesn’t quite do everything I want, though — where’s the full-featured, all-data, Swiss army knife for data?

October 27, 2010 tools

LINQ Has Changed Me

In the old days, the post-colonial, pre-LINQ days of yore, I’d have written a one-way MD5 encryption like so:

static string GetMD5String(string s) {
  MD5 md5 = new MD5CryptoServiceProvider();
  byte[] hash = md5.ComputeHash(Encoding.ASCII.GetBytes(s));
  StringBuilder sb = new StringBuilder();
  foreach( byte b in hash ) sb.AppendFormat("{0:x2}", b);
  return sb.ToString();
}

This implementation is fine and has served me well for 10 years (I pulled it out of the first .NET project I ever really did). However, after using LINQ for so long, it’s hard not to see every problem as an operation over sets:

static string GetMD5String(string s) { 
  return (new MD5CryptoServiceProvider()). 
    ComputeHash(Encoding.Unicode.GetBytes(s)). 
    Aggregate(new StringBuilder(), (working, b) => working.AppendFormat("{0:x2}", b)). 
    ToString(); 
} 

I can’t say that the LINQ version is any better, but it felt better. However, you’ll notice that I’m not using any of the LINQ keywords, e.g. select”, where”, etc. I find that I don’t really use them that much. It’s too jarring to mix them, e.g. (from f in foos select f).Take(3)”, since not everything has a LINQ keyword equivalent. I tend to do LINQ-less LINQ more often then not.

P.S. I assume someone will be able to tell me how I can do it better. : )

P.P.S. I’m using the Insert Code for Windows Live Writer add-in. I love WLW!

September 27, 2010 tools

Time to check the donuts

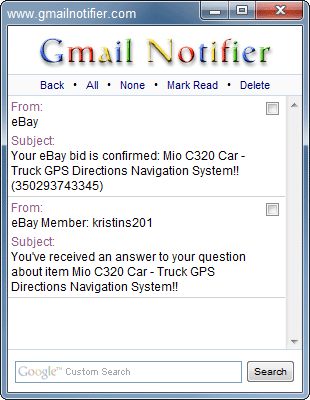
One day when I was supposed to be writing, I needed something to do (as often happens). In this particular case, I built a little tray icon app using the new (at the time) tray icon support in Windows Forms (this was a while ago : ). The data I was checking was my gmail account and whenever there was new mail, I’d pop up a notification. All very simple, so to be funny, instead of saying “You’ve got mail,“� my program said I’s time to check the donuts.”

Over time, I came to rely on this app but lamented the lack of features, like seeing who the email was from or marking an email as read w/o logging in, etc. Over time, I came to wish I had something like Gmail Notifier. I’s free and while it doesn’t contain an ’80s commercial reference, it has way more features than I ever built into mine. Oh, and the noise it makes when you get an email is priceless. Recommended.